Switching Deployment Method
This article provides instructions on how to switch between deployment methods within Proofpoint Essentials.
Before continuing, you should confirm that meet the following pre-requisites:
- Microsoft 365 is the mail provider
- you have Global Admin rights on the Microsoft tenant
- you are an organization admin or above in Proofpoint Essentials
- you have access to alter your DNS records when switching
Switching from MX Deployment to Integrated Deployment for Microsoft 365
- While logged into Proofpoint Essentials, under Account Management, click Profile.
- Locate the Mailflow Setup section then click View Details.
- You will see the current Deployment Method.
- Click Change Deployment.
- This will launch a new wizard where you can select Integrated with Microsoft 365
Integrated Deployment is not currently available for organizations that have Professional package subscription. In this situation, the Change Deployment button will not be available.
- The wizard will inform you that you need to change the MX records associated to the organization
- This refers to the Microsoft 365 MX records. This can be done after all the new rules have been configured and enabled.
- Once the wizard is complete, close the wizard, then click on Account Management, followed by Integrations.
- If you have an existing integration with Microsoft, click Details followed by Delete Integration
- Click Connect, followed by Next.
- This will prompt the Microsoft 365 Integration and a pop-up will appear for you to grant consent to begin the Integration with the Integrated Deployment Rules and Connectors
Wait for the Microsoft 365 Integration process to complete before proceeding to the next step.
- Log into the Microsoft 365 Exchange Admin Center.
- Click mailflow, followed by rules.
- Enable the two new inbound rulesthat were created by the integration tool.
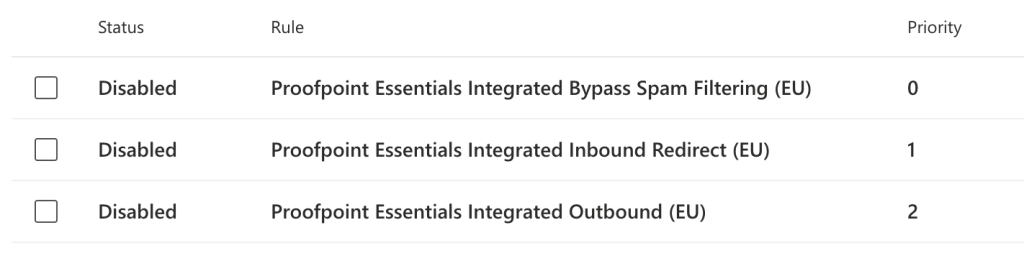
If you intend to use Proofpoint Essentials for Outbound, please ensure that your SPF and DKIM is set correctly prior to enabling the Outbound rule
EU and US Rules have different IPs within the ruleset and will be deployed based on which Proofpoint Essentials Stack you are located on.
Switching from Integrated Deployment for Microsoft 365 to MX Deployment
- While logged into Proofpoint Essentials, under Account Management, click Profile.
- Locate the Mailflow Setup section then click View Details.
- You will see the current Deployment Method.
- Click Change Deployment.
- This will launch a new wizard where you can select Direct MX Routing.
- The wizard will inform you that you need to change the MX and SPF records.
- This can be done after all the new rules have been configured and enabled.
- Once the wizard is complete, close the wizard, then click on Account Management, followed by Integrations.
- If you have an existing integration with Microsoft, click Details followed by Delete Integration.
- Now click Connect, followed by Next.
- This will prompt the Microsoft 365 Integration and a pop-up will appear for you to grant consent to begin the Integration with the MX Deployment Rules and Connectors.
Wait for the Microsoft 365 Integration process to complete before proceeding to the next step.
- Log into the Microsoft 365 Exchange Admin Center.
- Click mailflow, followed by rules.
- Confirm that the new rule “Bypass Spam Filtering for Proofpoint Essentials” and the Inbound connector “Inbound Connector for Proofpoint Essentials” are enabled.
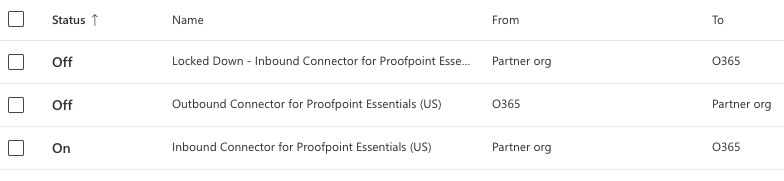
you intend to use Proofpoint Essentials for Outbound, please ensure that your SPF and DKIM is set correctly prior to enabling the Outbound connector
EU and US Rules have different IPs within the ruleset and will be deployed based on which Proofpoint Essentials Stack you are located on.


